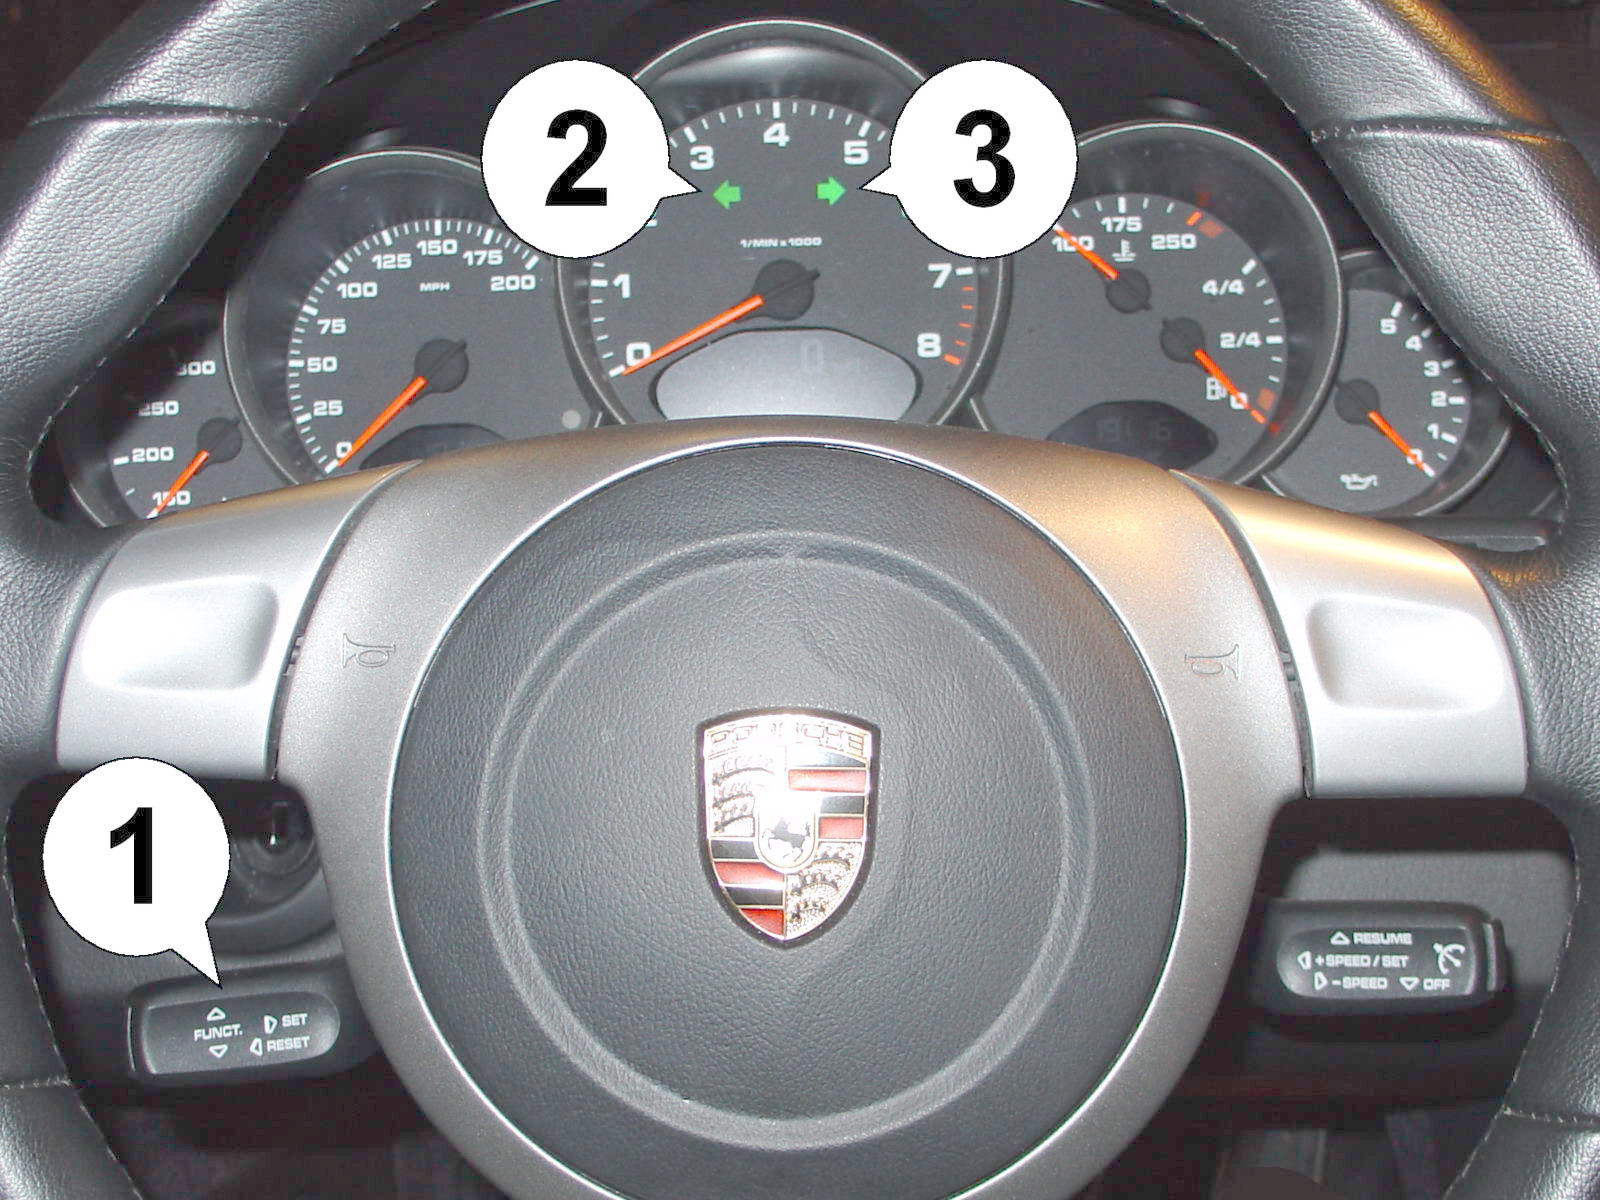
Function 1 - Main Switch - Workshop and Diagnostics ( 0=OFF / *1=ON LHD / 2=ON RHD )
The module can quickly and easily be enabled and disabled using this function. It acts like a master switch. When disabled, the module becomes completely inactive and behaves as if it was not installed.
Setting 0 disables the entire module while keeping all other function settings intact. This allows turning the module off and back on without the need to reconfigure all of the other user configurable settings.
Setting 1 is MODULE ON for LHD cars (Europe, USA etc.), Setting 2 is MODULE ON for LHD cars (UK, Australia, etc.)
IMPORTANT: In order to avoid problems with diagnostic tools and to avoid confusion or injury by unexpected top movement, we urge you to ALWAYS DISABLE the module before taking the car to a shop or lending it to a third person!
If problems with the top arise while the module is installed, ALWAYS contact Mods4Cars first at www.mods4cars.com. NEVER take the car to a dealer without getting support first!
Function 2 - One-Touch top operation ( 0=OFF / *1=ON WU / 2=ON WD / 3=EXT WU / 4=EXT WD )
This function enables one-touch console switch operation, for which the window position after top open as well as an optional extended convenience mode can be programmed.
Setting 1 is standard one-touch mode with windows up (WU) after top open.
Setting 2 is standard one-touch mode with windows down (WD) after top open.
Settings 3 and 4 (extended) are the same as 1 and 2, but additionally it is possible to turn off the ignition and pull the key while the top still continues.
Settings 3 and 4 require extra responsibility and caution to avoid injury by moving top parts to passengers not expecting the top to continue running after the engine is turned off!
Top operation with the console switch:
Holding down the switch (>2 sec) in either direction will operate the top in manual mode for as long as the switch is held.
Tap open 1x to open the top and bring the windows into the selected position (WU=Windows Up, WD=Windows Down).
Tap open 2x to open the top and bring the windows into the opposite position this one time (Down on settings 1 and 3, Up on settings 2 and 4).
Tap close 1x to close top and windows.
Tap close 2x to close only the top and leave the windows open.
Tap the console switch in any direction to interrupt an ongoing operation at any time - even if the top was started by remote!
Function 3 - Remote Control ( 0=OFF / *1=ON WU / 2=ON WD / 3=EXT WU / 4=EXT WD )
This function allows full automatic top operation with the original remote fob by pressing the lock and unlock buttons.
Also here it is possible to determine (independently from operation via the center console switch) the position of the windows after opening the top.
Setting 1 is standard remote mode with windows up (WU) after top open.
Setting 2 is standard remote mode with windows down (WD) after top open.
Settings 3 and 4 (extended) are the same as 1 and 2, only that it is possible to turn the ignition on and start the engine while the top still continues. Additionally getting out of the car and locking the doors by remote will not interrupt an ongoing top operation.
Settings 3 and 4 require extra responsibility and caution to avoid injury by moving top parts, as locking the (previously unlocked) doors with the remote will not stop the top!
Top operation with the remote fob:
When unlocking the car, hold down button for 3-4 sec.: Top opens.
When locking the car hold down button for 3-4 sec.: Top closes.
Hold down button longer than 5 sec.: Manual mode, top stops when button is released.
Function 4 - Extended comfort window control ( 0=OFF / 1=EMERGENCY / *2=FULL )
This function has three settings and will allow much more comfortable operation of the windows. If set to setting 1 and the ignition was not turned on or a door was opened after the ignition was turned off, all four windows can be operated by pushing both window-buttons simultaneously up or down. Very helpful if all windows are down, you have already pulled the key out and opened either door and then decide to roll the windows up. Also works one-touch by pushing both buttons either all the way up or down (2nd click).
Please Note: If the window buttons don't work (MY 2006+), you can also use the onboard computer stalk: Push up to close all windows, push down to open all windows. Setting 2 will furthermore enable comfort rear window one-touch control while driving. Forget the awkward rocker switch and leave it in the "front" position. Holding either button for an extra 2 seconds after the front window has opened/closed will automatically open/close the rear window. Holding either button in the one-touch position for about 2 sec. will automatically operate the front and rear window at the same time.
Function 5 - Lock-In automatic powerlocks ( 0=OFF / 1=CLOSE / *2=CLOSE&OPEN 1 / 3=CLOSE&OPEN 2 )
This function has three settings and will either lock all doors once the car starts moving (setting 1) or also unlock the doors when the key is removed from the ignition lock (setting 2). It can also be set to already unlock the doors in the moment the ignition is turned off (setting 3).
Function 6 - Chirp Sound on lock/unlock ( 0=OFF / 1=BEEPER L / *2=BEEPER L+U / 3=HORN L / 4=HORN L+U )
This function can be set to either chirp twice when locking the car (setting 1) or additionally chirp once when unlocking (setting 2). Setting 1 and 2 use the alarm horn, setting 3 and 4 use the regular (big) horn.
Function 7 - Trunk button delay and HomeLight XL ( 0=OFF / 1=TRUNK / *2=TRUNK&LIGHT )
This function has two settings and will either just delay the trunk button on the remote against unintended operation (setting 1) or additionally turn the headlights on for 30 sec., when the button is tapped twice within 2 sec. To open the trunk, hold down the button for 4 seconds continuously. To turn the headlights off manually, just tap the button twice again.
Function 8 - Passenger mirror park assist ( *0=OFF / 1=ON )
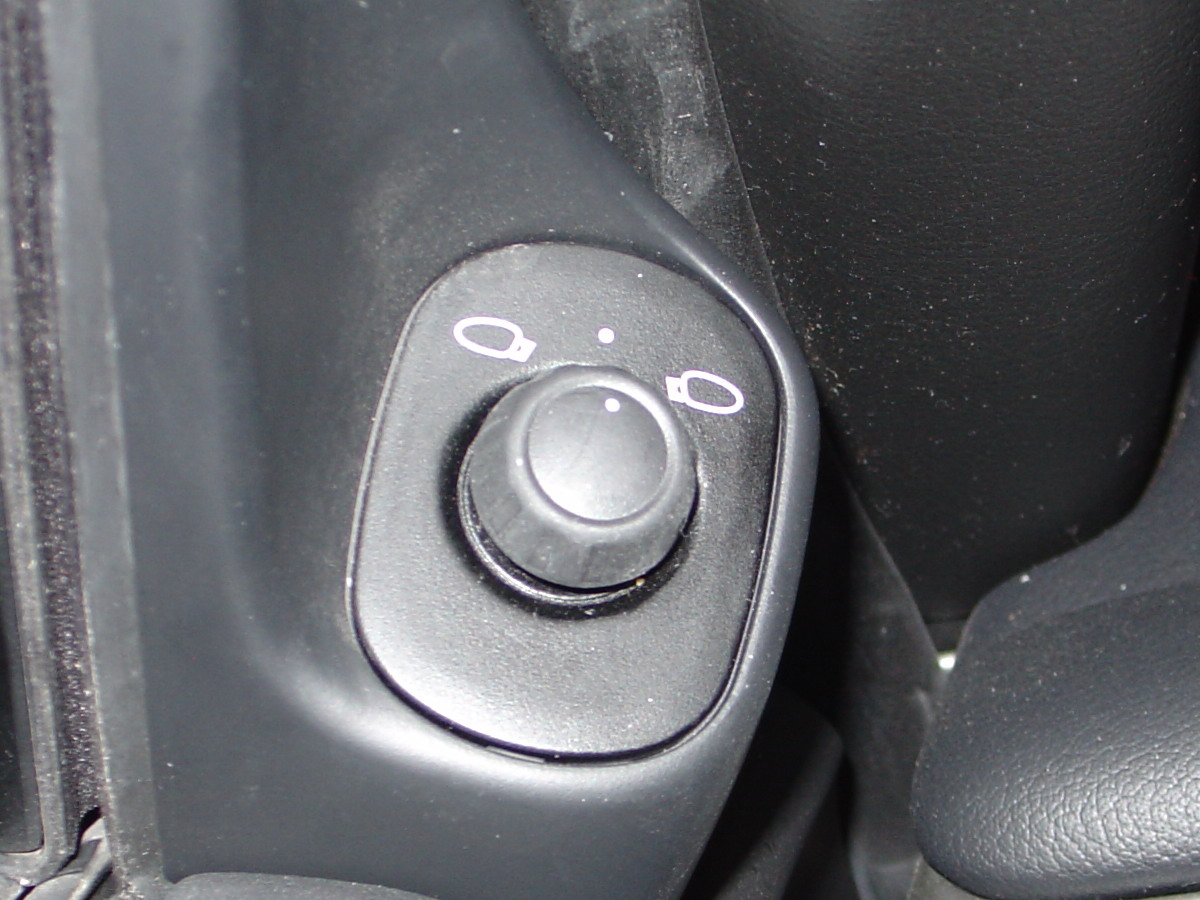
When enabled and the driver's mirror selector knob is set to the middle position, the passenger side mirror will dip down upon shifting to reverse gear. After leaving reverse gear, the mirror will return back up if one of these conditions is met: a) 10 sec. inactivity or b) forward speed of >5mph is detected.
Prior to using this function, please read and perform the calibration procedure on the last page of this manual (Programming the passenger mirror park assist).
The function can be disabled temporarily by turning the mirror select knob to the leftmost (driver's mirror) position.
If your car has seat-memory installed and therefore already offers the park assist feature, you can choose which one to use. Mirror select knob in middle position: mods4cars park assist. Mirror select knob in passenger mirror position: factory park assist.
Important: It is normal and intended, that the mirror first dips down all the way to the mechanical end-stop before returning to the programmed position. This is due to the fact that there is no externally accessible position memory for the mirrors and this is the only way to precisely reposition the mirror to the regular driving position after dipping down.
With function 8 enabled and the mirror programming procedure done, the up/down position should not be changed by any other means than the described programming procedure on the last page. The mirror will always return to the (absolute) programmed position, so any changes made would be lost after the first time of shifting into reverse gear.
|