INSTRUCTION MANUAL


STAXMZ1 / STAFMZ1

Comfort Roof Control Module for

  • Mercedes Benz SL (R129) Convertible

    v1.2x
    Compatible with ALL SL R129 model years (1990 - 2002, IR and RF remote)


  • Further information and manuals for all products can be found on our web site

    w w w . m o d s 4 c a r s . c o m

     
    We explicitly point out that all functions of this control unit should be used only while exercising caution and responsibility. We can NOT be held liable for any damage or injury caused by installing or using this product.
    PLEASE READ THE COMPLETE MANUAL CAREFULLY BEFORE USING THIS PRODUCT.
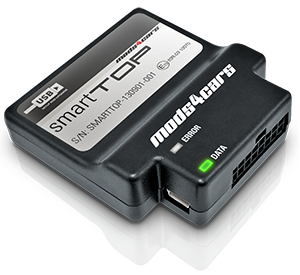
    Detailed function description (* = Factory Setting):

    Function 1 - Module Main Switch - Workshop/Diagnose and Hardtop Mode ( 0=Hardtop / *1=Factory / 2=Module ON )
    When set to 0 (Hardtop), the convertible top switch is entirely deactivated to prevent any unwanted Hardtop eject.
    WARNING: ALWAYS SET THE MODULE TO THIS MODE OR FACTORY MODE AFTER INSTALLING THE HARDTOP. OTHERWISE IT IS POSSIBLE TO EJECT IT BY REMOTE OR WHILE DRIVING!
    When set to 1 (Factory), the module becomes completely inactive and behaves as if it was not installed.
    This function acts like a master switch. The individual settings and preferences for the functions below stay unchanged. This way the module can easily be deactivated and reactivated.


    Function 2 - One-Touch for the soft-top switch ( 0=OFF / *1=ON / 2=DELUXE[!] )
    When enabled, the center console switch operation is enhanced as follows:
  • Holding down the switch in either direction (>5sec) will operate the top as long as the switch is held.
  • Tap OPEN to open the top and lower the windows.
  • Tap OPEN 2x (1 sec apart) to open the top, then raise the windows.
  • Tap CLOSE to close the top and the windows.
    Emergency stop: Tap the top switch in either direction to stop the top operation immediately.

    When set to DELUXE mode, it is possible to turn the ignition off and pull the key out, while the top operation continues. [!] USE WITH EXTRA CAUTION!

    PLEASE NOTE: Do not use the "deluxe" setting on cars with 3-plug top controller (pre 1993 models with IR remote) as there is a 10 sec delay in the top controller that makes this function appear to not work!


    Function 3 - Remote Control ( *0=OFF / 1=IR one button / 2=RF three button )
    This function allows convertible top operation with the original remote fob. Once started, the top will complete the cycle automatically. Tapping the button on the remote again will interrupt the operation immediately. With the IR remote it is possible to lock the car by tapping it briefly while the top is in motion. To interrupt the top, hold down the button for about 1/2 sec.

    IR (one button) Remote:
  • Hold down the button (>3sec) while pointing the IR at either door handle. If the top was open, it will close and vice versa.
    IMPORTANT: On some cars the IR remote does not transmit a continuous signal when holding down the button. If that is the case, either use the Key in the driver's side door (turn and hold for 5 sec) or switch the module to RF Remote mode and tap 2x/3x to activate top.

    RF (three button) Remote:
  • Tap UNLOCK on the remote 2x (in 1 sec intervals) to close the top and the windows.
  • Tap UNLOCK on the remote 3x (in 1 sec intervals) to open the top and lower the windows.
  • Tap UNLOCK on the remote 4x (in 1 sec intervals) to open the top, then raise the windows.

    PLEASE NOTE: On some cars (earliest models with 3-plug top controller and IR remote) there is a 8-10 sec delay between giving the remote start command and the top actually moving! This is normal and can not be avoided. To use the top by remote, we recommend getting acquainted with the activation delay and counting down from 10 to 0 before assuming the top command did not work. Operation from the center console button is always instantaneous.


    Function 4 - Maximum allowed speed for top operation ( *0=0kmh / ... / 6=60kmh)
    Setting the max allowed speed for top operation in 6 steps of 10km/h (~7mph). Setting 0 only allows top operation while halted.

    PLEASE NOTE: On the earliest models (3-plug top controller and IR remote) the speed setting is in steps of 5km/h instead of 10km/h, yielding a maximum speed (setting 6) of 30kmh/~20mph. The top mechanism was NEVER designed to be operated while driving, so please use EXTREME CAUTION to not damage the mechanics.
  • Installation - Steps 1-3
    1. Turn the ignition off, and pull the key from the ignition lock before installing. Open the right luggage compartment and remove the bottom cover.
    2. Underneath the cover is at least one control unit. The convertible top controller (1) has a very large plug with a wiring harness consisting of thin wires and a smaller plug with a harness if thicker wires going to it. Remove the black fabric tape from the harnesses to gain access to the individual wires.

    In the following steps the correct wires need to be selected by their base colors and stripes. "green/black" means green wire with a thin black stripe. DO NOT mistakenly use a black wire with a green stripe! If you think two wires have the SAME colors, look very closely! They are all different.
    3. Attach the supplied wire-taps to the wires. Use a pair of combination pliers and make sure the taps attach securely with an audible "click". Please refer to the diagrams below for wire colors. Some wires need to be tapped twice and cut in the middle to route their signal "through" the smartTOP module. Some wires ends are not used and should be protected with electrical tape.
    Again, please inspect each wire thoroughly and make sure you have the correct color combination, before tapping or cutting.
    The earliest models may use a green/purple wire instead of the described black/yellow. If there is no black/yellow (don't mix up with yellow/black!) then use green/purple instead.
    Installation - Steps 4-6
    4. Connections PRE 1993 (click to enlarge):
    Left: Pins in smartTOP plug (see drawing), right: Wire colors in car harness.
  • 1 <-> brown (ground)
  • 2 <-> white (IR Signal)
  • 3 <-> black/yellow (VSS pulse INPUT)
  • 5 <-> blue/white (roof open INPUT)
  • 6 <-> grey/blue (roof lid locked)
  • 7 <-> not used
  • 8 <-> blue/white (roof open OUTPUT)
  • 9 <-> red/yellow (+12V)
  • 10 <-> not used
  • 11 <-> not used
  • 13 <-> blue/black (roof close INPUT)
  • 14 <-> black/purple (Ignition INPUT)
  • 15 <-> connect to black wire on relay
  • 16 <-> blue/black (roof close OUTPUT)
    INPUT means connect to wire end away from roof unit (before the cut), OUTPUT means connect to the wire end which is going directly into the roof control unit (after the cut).
  • 5. Connections POST 1993 (click to enlarge):
    Left: Pins in smartTOP plug (see drawing), right: Wire colors in car harness.
  • 1 <-> brown (ground)
  • 2 <-> yellow/white (RF) or white (IR)
  • 3 <-> green/purple (VSS pulse INPUT)
  • 5 <-> yellow/red (roof open INPUT)
  • 6 <-> grey/blue (roof lid locked)
  • 7 <-> green/black (ABS pulse OUTPUT)
  • 8 <-> yellow/red (roof open OUTPUT)
  • 9 <-> red/yellow (+12V)
  • 10 <-> not used
  • 11 <-> not used
  • 13 <-> yellow/green (roof close INPUT)
  • 14 <-> black/purple (Ignition INPUT)
  • 15 <-> connect to black wire on relay
  • 16 <-> yellow/green (roof close OUTPUT)
    INPUT means connect to wire end away from roof unit (before the cut), OUTPUT means connect to the wire end which is going directly into the roof control unit (after the cut).
  • 6. Connect the supplied smartTOP harness to the wire taps. Make sure the contact blades slide into the slots of the taps and make proper contact. Then connect the smartTOP module to the harness plug. After connecting the module, the LED (1) on the module should light up for about 5 seconds. It should blink when the ignition is on and show the current module state:

  • LED blinking: Module is active
  • LED off: Module is in standby mode

    IMPORTANT: The LED must immediately turn on when the open button (3-button remote) is pressed. If it doesn't, double check plug no.2 connection and look for another yellow/white wire in the bundle. If there is a second yellow/white wire, remove the tap from the current wire and attach it to the other one, then retest.
  • Programming
    This module is equipped with our interactive setup feature to allow easy setting of the desired options.
    All programming is done by using the convertible top switch (1) and the red light inside the top switch. Functions and settings are indicated by blinking patterns of the red light. Navigation is done by pushing the switch back (top open) for next function or forth (top close) for next setting. After selecting the last function or function setting, the setup automatically jumps back to the first function / lowest setting. Each time either a new function is selected or a function's setting is changed, the red light will indicate the new status by first blinking the function number and then the current setting number.
    To enter programming mode, first make sure the ignition if off. Push the top switch back (top open) while turning the ignition from full-off to full-on (not starting the engine!), then let go after about 2 seconds. The light will now indicate the first function and setting. Usually 1-1, which means function 1 is set to setting 1 (ON) - The default. From this point on you can navigate through the functions by pushing the top switch back and once the red light has finished indicating the function and setting, change the setting by pushing it forth. The new settings are active immediately.

    To end programming mode, either wait for 30 sec. or turn the ignition off.

    Examples:
  • Function 1 (Module mode) is set to Factory (setting 1): Light blinks once to indicate function 1, then blinks once to indicate that this function is set to setting 1.
  • Function 2 (Top Switch Mode) is set to DELUXE (setting 2): Light blinks 2x to indicate function 2, then blinks twice to indicate that this function is set to setting 2.
  • Function/Setting Matrix (*green fields are defaults)
    Product: STAFMZ1 - SmartTOP for Mercedes Benz SL (R129)
    Firmware: v1.2x
    SETTING 0SETTING 1SETTING 2SETTING 3SETTING 4SETTING 5SETTING 6
    FUNCTION 1 HARDTOP*FACTORYON----
    Main SwitchConsole Switch disabledFactory behaviorModule enabled
    FUNCTION 2 OFF*ONETOUCHEXT----
    Conv. Top One-TouchDon't change center console switch behaviorEnable one-touch operation while drivingAllow ignition off during top operation
    FUNCTION 3 *OFFIRRF----
    Remote FunctionsNo remote functionsIR Remote (1button)RF Remote (3button)
    FUNCTION 4 *0 km/h10 km/h20 km/h30 km/h40 km/h50 km/h60 km/h
    Maximum SpeedOnly while halted10 km/h (~7mph)20 km/h (~13mph)30 km/h (~19mph)40 km/h (~25mph)50 km/h (~31mph)60 km/h (~38mph)